6.29.2008
July 4th Crop!
I plan to be there, my hubs is spending the day fishing with 3 buddies, I'll go croppin' with mine!!
6.27.2008
SBC041508 & SUO

Challenge is here
Paper: DSP, Whisper White, Garden Green, Pumpkin Pie
Other: Coluzzle, Rub On's, Buttons
SBC061508 & SUO

Challenge is here
Paper: DSP, Chocolate Chip, Whisper White, Regal Rose, Rose Red
Inks: SU Chocolate Chip
Other: Coluzzle, Love & Happiness Rub On's
3D032 & SUO

The challenge is here
This is a popper. Basically it's a covered can, that you stuff full of goodies (for a birthday, for shower gifts, etc, etc) and they use the pull tab to open it and get the goodies out. It's a fun little gift container for sure!
SU Stamps: Lexicon of Love
Paper: DSP
Inks: SU Basic Black
Other: Red Tape, Mono, ribbon
3D054 & SUO

Challenge is here
SU Stamps: It's All Good
Paper: So Safron
Inks: SU Chocolate Chip
Other: Coluzzle, Crystal Effects, Glue Dots, Paper Clip
6.25.2008
LSC165

This challenge can be found here.
SU Stamps: It's All Good
Paper: nothin' but scraps!
Inks: SU Basic Black
Other: Coluzzle, ribbon, popdot, glitter & Tombo
LSC173
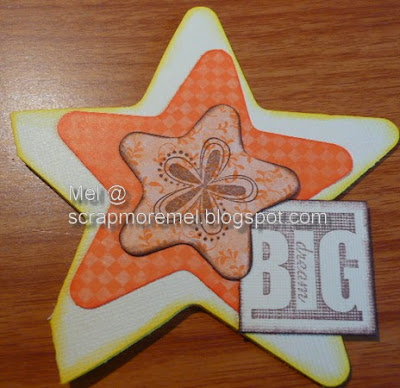
This challenge can be found here
SU Stamps: It's All Good, Priceless
Paper: nothin' but scraps!
Inks: Color Box: Orange, Canary & Dark Brown
Other: Coluzzle & Tombo
6.24.2008
6.23.2008
Country Scrappin' Classes
7/1: 2-Way Mini Albums, 4:30-6:30 $5+supplies
7/4: Crop, 10am-6pm (this is just a crop going on during the day- more details to follow- she wants to do something fun!)
7/11: CF Mini Album, 10:30-12:30 or 4:30-6:30 $5+supplies
7/11: Comp Book, 1-3 $5+supplies
7/12: Scrapbook 101, 10:30-12:30 $20
7/12: Scrapbook 201, 1:30-3:30 $20
7/18: Waterfall Album, 10:30-12:30 or 4:30-6:30 $5+supplies
7/22: Wood Home, 1:30-3:30 or 4:30-6:30 $20
I will also be doing a Kids Kamp. Call or email Donna for more info, click here, as far as cost is concerned.
Kids Kamp runs from 8/11-8/15, from 10:30-11:30, for 8-12 year olds.
Monday: Mini Bag Book
Tuesday: Journal
Wednesday: Picture Frame
Thursday: Wood Monogram (their choice)
Friday: Take it with ya!
If you have any questions, please direct them to Donna, you can ask me, but really, all I'm doing is teaching them. She will have the supply lists ready for you once you sign up, and also for KK there is a price break for having more than one child come, and also for attending all 5 sessions.
6.20.2008
6.19.2008
FYI
Just so you know.
6.18.2008
Tutorial: Double Diagonal Card
*Trimmer
*Double sided pattern paper or card stock (at least 8.5X11, can be 12X12)
*coordinating papers (scraps work)
*Bone folder
*pretties
DIRECTIONS

 2. After the paper is the size you need it, I inked the edges. This is not needed, but I love inking. Then you take one end of the paper and fold the corners to meet each other in the center, at 4.25" You are folding the 8.5" side.
 3. Then you take the long side, and fold it all the way over to meet the new line of paper.
 4. You then flip it over, exposing the other side, and rectangle it. Leaving about an inch (or so- it doesn't matter) to over hang.
 5. That extra inch and tucked into the fold. The picture above shows the back side, where it's tucked in.
 6. This is the front side. The folds create 2 pockets.
 7. I then used my coluzzle to create 2 tags (you can use anything you wish: Sizzix, Quickutz, Cricut, etc, etc.)
  8. And finish the card up by making it pretty with stamping & ribbons!
Challenge: SS, GG, RR, WW
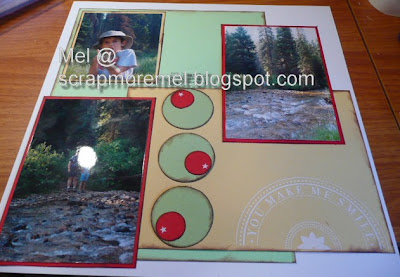
Michele posted a challenge and I took her up on it. What nifty, to me, is that very rarely do I use SU exclusively, but for this page I did. Mom- your album is getting so close to being done! It might actually be ready for you come your birthday or GP day at least!
6.17.2008
Before & After
BEFORE:

And the unveiling of my personal playroom AFTER! I have desk space, I have a floor, and I have a bed. I organized the paper racks in my closest, the tubs under my corner spot, and also sifted thru my scrap papers.
I'm so excited to have space on my desk again, I'd forgotten what the table top looked like!
6.16.2008
Journal: Cherish
Blog Candy Winner!
Congratulations to: JennaZ!
Please email me at ezscrappinmel at gmail dot com and I'll get the loot postal ASAP!
Thanks everyone for playing in my 1st ever blog candy contest!
6.15.2008
Friday the 13th Blog Candy
To get in on it, just leave a comment! Only one comment per person please. Yes, I will ship out of the US, and in the US also. So, no matter where you live, comment! I know a lot of people come, and 98% do not leave comments. It's a chance for me to meet you.
Drawing will be done Monday, June 16th, morning.

Stampin' Up's Retired List
For those who live in my town, feel free to stop by my house- my catalog is already marked up for easy viewing of the retired list.
I hate things to retire... but I do look forward to the new stuff!!
6.13.2008
6.11.2008
FTS June Challenge: You are here
We have snow people
That is just SICK & WRONG.
We're renting movies, and making messes... I swear, Mother Nature is playing a sick joke- it's supposed to almost be summer! We didn't even get spring yet!
*I just turned on the heater in 2 rooms, and the fire place is now going again as well. This makes me cry, big, fat tears.
6.10.2008
Baby Girl: black & pink
Tutorial: Altering Wood Letters
*Wood letters (any will work- I cut my own, the ones I'm using for this are 8")
*Paint, alcohol ink, walnut ink, etc
*Scissors and/or X-acto knife
*Adhesive (I used tacky glue & glue dots)
*Ink pad
*Ribbon
*Paper & pretties
 1. Either pick up your letters at a craft store, or cut them out. I notched the back for easier hanging.
2. Once ready, paint the sides and back side. The front doesn't matter since it will be covered up. For simplicity I use spray paint, in black for this project. Repeat if needed.
3. Leave letters alone over night, or until dry. I prefer to leave over night so I know for sure everything is dry to perfection.
 4. Pick out pattern papers of choice. I've used as many of 3 papers per letter, but for this project I used only 2 papers for each letter- 4 papers total.
5. Trace out your letter shapes on the paper. Make sure you are tracing them correctly, and not backwards! For ease, trace the letter facing the correct direction with the paper underneath. Then you don't need to worry about flipping anything around.
6. Cut along pencil lines for all letters. Erase marking as needed.
 7. Use adhesive, I use tacky glue for this part, to cover the letter. Make sure to get the edges really done. Press paper down firmly and hold in place for a few second. I like to put something heavy on top of the letters while I do the rest of the word- just extra insurance for no air bubbles in my paper.
8. Don't worry about ugly edges- we're getting to that!
 9. Put a thin line of adhesive on the edge where the papers meet, and cover with ribbon. Once dry, about 10 minutes, trim ribbons to the edge. Sometimes I wrap the ribbons all the way around, but I didn't for this project.
10. Ink, if you like to ink, the edges of your letter. If you are not a fan of inking- use paint. This is the best way to clean up any choppy cuts or ragged edges. It also helps tie everything together.
 11. This is where you get to have fun! Go out and embellish to your hearts content.


